Wan Time to Move
https://youtu.be/s3Fch5zLzdM?si=YAYJnOZ29Kgw7XGO
https://redd.it/1pqgeon
@rStableDiffusion
https://youtu.be/s3Fch5zLzdM?si=YAYJnOZ29Kgw7XGO
https://redd.it/1pqgeon
@rStableDiffusion
YouTube
Wan Time To Move
Wan Time-To-Move is a very interesting workflow, built on the Wan 2.2 model. It has the ability to take rough slap comps and refine them into more polished results, giving us greater control over the effects timing. In this test, I experimented with ignition…
Z-Image Turbo Character LoRA Guide - Easy How-To Guide (ADHD friendly)
**Introduction**
Hey folks out there. I already shared my guide over on civitai, but I want to share it here as well. ***If you just want to start, skip forward to „Dataset“.***
I tried to write guide on how I did it. I searched a lot for simple fast forward guides for ZIT Charter LoRAs but I couldn’t find a proper one. So I decided to write one on my own. This is my first time writing a guide, and especially the first time writing something like this in English. I also can’t promise you that this guide will workout for you. I am an ADHD patient so I wrote it optimized for my way of thinking and understanding level. **I presuppose knowledge of how to use different base AI models like the big LLMs (Gemini, ChatGPT..) and Midjourney or other image generation models/tools. I also assume you got the hardware to do it or know how to rent it. You just need one card with 24GB or more.** I will try it on a RTX 5060Ti 16GB in the future and share the results as an update. But as far as I know, it should be possible to do the training for Z-Image also on the low tier cards.
**Content/Procedure**
* dataset creation
* training
**Tools being used**
* ChatGPT or Gemini (other LLMs possible, but these are the most common ones)
* Googles Nano Banana
* Ostris AI-Toolkit (also available as template on [runpod.io](http://runpod.io))
**Dataset**
A dataset is a set of pictures and captions for LoRA training. To generate your dataset multiple steps are required.
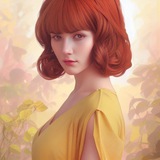
**Base portrait**
Your first step is the base portrait of the character which you can generate where you want. My recommendations are MidJourney or Google’s Nano Banana.
The base portrait should be a frontal 3/4 upper-body portrait with neutral expressions.
**Edit to dataset**
After you got your base portrait, you are gonna generate the dataset. The base portrait gets edited by an AI-Model into different portraits with the same character.
The best models for this task is Google’s Nano Banana. You can also use Flux.1 Kontext, but Nano Banana is far better based on my experience.
In this guide we are gonna generate a total of 20 images for the dataset. More is possible and could improve results, but 20 is more than fine.
Use your base portrait always as input picture and generate picture after picture. You can use the following 19 neutral prompts. But I would recommend you to use your ChatGPT or Gemini, to generate you optimized prompts, based on the neutral prompts and your base portrait.
*Prompts:*
**Head & Face Focus (9 prompts)**
1. Frontal headshot
*“Edit the image to show a frontal headshot, head facing directly forward, neutral expression, even soft lighting.”*
2. Slight left turn
*“Edit the image so the head is turned slightly to the left, close-up portrait, relaxed neutral expression.”*
3. Slight right turn
*“Edit the image so the head is turned slightly to the right, close-up portrait, neutral expression.”*
4. Three-quarter left
*“Edit the image to a three-quarter left head angle, face clearly visible, soft natural lighting.”*
5. Three-quarter right
*“Edit the image to a three-quarter right head angle, calm expression, balanced lighting.”*
6. Left profile
*“Edit the image to a clean left profile view, head in full side angle, neutral lighting.”*
7. Right profile
*“Edit the image to a clean right profile view, head in full side angle, soft shadows.”*
8. Slight downward gaze
*“Edit the image so the head tilts slightly downward, eyes looking down gently, close-up framing.”*
9. Slight upward gaze
*“Edit the image so the chin is slightly raised, eyes looking forward or slightly upward, soft light.”*
**Upper Body / Mid-Shot (6 prompts)**
10. Upper-body frontal
*“Edit the image to an upper-body portrait, frontal angle, relaxed posture, neutral background.”*
11. Upper-body three-quarter left
*“Edit the image to an upper-body shot at a three-quarter left angle, natural stance.”*
12. Upper-body three-quarter
**Introduction**
Hey folks out there. I already shared my guide over on civitai, but I want to share it here as well. ***If you just want to start, skip forward to „Dataset“.***
I tried to write guide on how I did it. I searched a lot for simple fast forward guides for ZIT Charter LoRAs but I couldn’t find a proper one. So I decided to write one on my own. This is my first time writing a guide, and especially the first time writing something like this in English. I also can’t promise you that this guide will workout for you. I am an ADHD patient so I wrote it optimized for my way of thinking and understanding level. **I presuppose knowledge of how to use different base AI models like the big LLMs (Gemini, ChatGPT..) and Midjourney or other image generation models/tools. I also assume you got the hardware to do it or know how to rent it. You just need one card with 24GB or more.** I will try it on a RTX 5060Ti 16GB in the future and share the results as an update. But as far as I know, it should be possible to do the training for Z-Image also on the low tier cards.
**Content/Procedure**
* dataset creation
* training
**Tools being used**
* ChatGPT or Gemini (other LLMs possible, but these are the most common ones)
* Googles Nano Banana
* Ostris AI-Toolkit (also available as template on [runpod.io](http://runpod.io))
**Dataset**
A dataset is a set of pictures and captions for LoRA training. To generate your dataset multiple steps are required.
**Base portrait**
Your first step is the base portrait of the character which you can generate where you want. My recommendations are MidJourney or Google’s Nano Banana.
The base portrait should be a frontal 3/4 upper-body portrait with neutral expressions.
**Edit to dataset**
After you got your base portrait, you are gonna generate the dataset. The base portrait gets edited by an AI-Model into different portraits with the same character.
The best models for this task is Google’s Nano Banana. You can also use Flux.1 Kontext, but Nano Banana is far better based on my experience.
In this guide we are gonna generate a total of 20 images for the dataset. More is possible and could improve results, but 20 is more than fine.
Use your base portrait always as input picture and generate picture after picture. You can use the following 19 neutral prompts. But I would recommend you to use your ChatGPT or Gemini, to generate you optimized prompts, based on the neutral prompts and your base portrait.
*Prompts:*
**Head & Face Focus (9 prompts)**
1. Frontal headshot
*“Edit the image to show a frontal headshot, head facing directly forward, neutral expression, even soft lighting.”*
2. Slight left turn
*“Edit the image so the head is turned slightly to the left, close-up portrait, relaxed neutral expression.”*
3. Slight right turn
*“Edit the image so the head is turned slightly to the right, close-up portrait, neutral expression.”*
4. Three-quarter left
*“Edit the image to a three-quarter left head angle, face clearly visible, soft natural lighting.”*
5. Three-quarter right
*“Edit the image to a three-quarter right head angle, calm expression, balanced lighting.”*
6. Left profile
*“Edit the image to a clean left profile view, head in full side angle, neutral lighting.”*
7. Right profile
*“Edit the image to a clean right profile view, head in full side angle, soft shadows.”*
8. Slight downward gaze
*“Edit the image so the head tilts slightly downward, eyes looking down gently, close-up framing.”*
9. Slight upward gaze
*“Edit the image so the chin is slightly raised, eyes looking forward or slightly upward, soft light.”*
**Upper Body / Mid-Shot (6 prompts)**
10. Upper-body frontal
*“Edit the image to an upper-body portrait, frontal angle, relaxed posture, neutral background.”*
11. Upper-body three-quarter left
*“Edit the image to an upper-body shot at a three-quarter left angle, natural stance.”*
12. Upper-body three-quarter
Runpod
Runpod | The cloud built for AI
GPU cloud computing made simple. Build, train, and deploy AI faster. Pay only for what you use, billed by the millisecond.
right
*“Edit the image to an upper-body shot at a three-quarter right angle, calm posture.”*
13. Seated upper-body
*“Edit the image so the subject is seated, upper-body framing, relaxed shoulders, natural lighting.”*
14. Upper-body with slight lean
*“Edit the image to show a subtle forward lean, upper-body framing, neutral expression.”*
15. Upper-body with head tilt
*“Edit the image so the head tilts slightly to one side, upper-body portrait, soft light.”*
**Full Body / Spatial Context (4 prompts)**
16. Full-body frontal
*“Edit the image to a full-body view, standing naturally, frontal angle, simple environment.”*
17. Full-body three-quarter left
*“Edit the image to a full-body view at a three-quarter left angle, relaxed stance.”*
18. Full-body three-quarter right
*“Edit the image to a full-body view at a three-quarter right angle, neutral posture.”*
19. Full-body side view
*“Edit the image to a full-body side view, natural standing pose, balanced lighting.”*
After you generated every picture, store them into a folder and rename them. It is important to add a counter to the filename.
*yourcharacter\_0001.png*
*yourcharacter\_0002.png*
*…*
**Captioning**
A dataset isn’t complete without captions. You have multiple options to gain them. You need one .txt for each picture with the same filename as the picture.
*yourcharacter\_0001.txt*
*yourcharacter\_0002.txt*
*…*
The first option is to type them by hand. Just one short or two sentences describing the picture. Try to be consistent, use the same sentence-scheme for each picture. There are websites like [this one](https://warmbutter.com/ai-toolkit/image-caption/) which are handling the filename formatting for you.
The second and more efficient option for captioning is using Gemini or ChatGPT. Both models are capable to type all captions for you, even optimized for Z Image Turbo. Just give them the instruction to caption the following pictures optimized for Z Image Turbo and post the pictures into the chat. You want them to output you a .txt for each picture with correct filenames. Read through all of them to make sure their are correct.
The third option is as good as Gemini or ChatGPT, but runs locally. If Gemini or ChatGPT wouldn’t caption your pictures because they are too spicy, you could use JoyCaptions. For this process I’ll link to this [guide from StartHua](https://www.runcomfy.com/comfyui-nodes/Comfyui_CXH_joy_caption). I won’t explain ComfyUI in this guide.
After you got all the captions, put them into the same folder as your pictures. Now your dataset is complete.
**Set up the Dataset in AI toolkit**
To train the actual LoRA we’ll use Ostris AI-Toolkit. You can run it via [runpod.io](http://runpod.io) with [Ostris template](https://console.runpod.io/hub/template/ai-toolkit-ostris-ui-official?id=0fqzfjy6f3) or run it locally. For this process I’ll link to the [guide from Ostris](https://github.com/ostris/ai-toolkit) himself. I won’t explain the setup here.
After you started the AI-Toolkit, you head over to *„Datasets“*. Click on *„New Dataset“*, name it how you want, it doesn’t matter for the training. Then you click on *„Add Images“*. Now you upload all your pictures and caption files from the dataset. Once it is uploaded, AI-Toolkit will assign the captions to the right pictures.
**the training job**
Now head over to *„New Job“*. Here you’ll setup the parameters for the training, but don’t worry it’s easy to learn just hard to master.
I’ll walk you through every shard that I think is relevant for now from left to right. The good thing is, most of the settings are already pre-applied, just change the settings I’ll tell you and you should be good to go.
You start in the *„Job“* shard. Here you just need to give your LoRA a name. The next shard is *„Model“*. Click on *„Model Architecture“* and choose the *„Z-Image Turbo (w/Training Adapter)“*. In the „Quantization“ shard you could change the „Transformer“ to *„NONE“* or leave it to *„float8“*. It depends on how much VRAM you have. If
Warm Butter Design
LoRA Training Image Caption Tool - Warm Butter Design
Image Caption Tool streamlines the creation of image captions for LoRA training. Easily generate and manage captions for your images, and download them as individual text files to enhance your AI model's training dataset.
you have over 24GB of VRAM you should be good to go with *„NONE“*. *„float8“* would be slower.
Now head over to the *„Training“* shard. Change the *„Timestep Type“* to *„Sigmoid“* and activate *„Cache Text Embeddings“*. Don’t change anything else here, specially not the *„Learning Rate“*, increasing it could cause it to crash. After you trained your first model you can try to increase the steps, if you think you need more, but 3000 should be enough.
After this, go the *„Dataset“* shard. Here you just select your dataset.
The last step are the sample prompts. If you’re using a trigger word, make sure you include it in your sample prompt, otherwise the samples wouldn’t apply the LoRA properly.
Now you can start your training job.
The training should take about 2 hours on a RTX 5090. After the training is done, go through your samples and decide which model is the best. After all my tries, I found the 3000 steps one the most useful.
And that’s it, now you got a Character LoRA for Z-Image Turbo.
**A few words in the end**
I hope this guide helped you guys to just easily train a Character LoRA for ZIT without your brain melting. I know that I didn’t explain much about what each setting does, but this wasn’t my intent with this guide. It just should walk you easily through the steps which are needed to train a LoRA.
I’m open for hints or improvements of the guide and I would love to exchange information and research about this topic.
https://redd.it/1pqjav6
@rStableDiffusion
Reddit
From the StableDiffusion community on Reddit: Z-Image Turbo Character LoRA Guide - Easy How-To Guide (ADHD friendly)
Explore this post and more from the StableDiffusion community
This is how i am able to use Wan2.2 fp8 scaled models successfully on a 12GB 3060 with 16 GB RAM.
A little info before i start. When i try generating the normal way with the default workflow, the high noise part always succeeds, but it OOMs or outright crashes when switching to the low noise node. So now i know atleast the high noise works.
I also saw someone use the low noise model as a T2I generator. So i tried that and it worked without issues. So both of the models work individually but not continously on this card.
So what if there was a way to save the generated high noise data, and then feed that into the low noise node after clearing tha RAM and VRAM.
Here is the method i tried that worked.
https://pastebin.com/4v1tq2ML
step 1 - Disable the low noise group so only the high noise group is active. Click run. it will
save the data with the 'Save Latent' node.
After its done, it should save a .latent file in outputs/latents.
step 2 - Important. Unload models and execution cache.
you can use this
https://preview.redd.it/t4bm4rcd558g1.png?width=559&format=png&auto=webp&s=7a2127e439dd5ec2d19db57e3bded7fd4db2d459
or if you have installed christools, use these two
https://preview.redd.it/gew5jybh558g1.png?width=1155&format=png&auto=webp&s=dc2bb969a65254e8326c0533b78f010e1a8dd71d
sometimes you have to click this twice to work. make sure vram is cleared or it will definately throw out an OOM
step 3 - Disable the high noise group and enable the low noise group.
step 4 - Open the output/latents folder and drag the .latent file on this node. or just upload it
the normal way.
https://preview.redd.it/8nsmoehi658g1.png?width=203&format=png&auto=webp&s=7e0f5aeee21fe23cb947f6cadd4ccc6aa732448c
Click run.
https://reddit.com/link/1pqip5g/video/mlokkyta758g1/player
this is generated using fp8 scaled model on 3060 and 16 GB ram.
https://reddit.com/link/1pqip5g/video/hb3gncql758g1/player
here is the the same video with upscaled and with frame interpolation, The output set to 32fps.
the original video is 640x640, 97 frames, took 160 seconds on high and 120 seconds on low. thats around 5 minutes. the frame interpolated took a minute longer.
if you are using an older GPU and you are stuck with weaker quant ggufs like Q4, try this method with Q5 or Q6.
I am sure there is a better way to do all this. like adding the Clean vram node between the switch. It always runs out of memory for me. This is the way that has worked for me.
You can also generate multiple high noise latents at once. And then feed that data to the low noise node one by one. That way you can generate multiple videos with just loading both the models once.
https://redd.it/1pqip5g
@rStableDiffusion
Pastebin
wan 2.2 split - Pastebin.com
Pastebin.com is the number one paste tool since 2002. Pastebin is a website where you can store text online for a set period of time.
Advice for beginners just starting out in generative AI
Run away fast, don't look back.... forget you ever learned of this AI... save yourself before it's too late... because once you start, it won't end.... you'll be on your PC all day, your drive will fill up with Loras that you will probably never use. Your GPU will probably need to be upgraded, as well as your system ram. Your girlfriend or wife will probably need to be upgraded also, as no way will they be able to compete with the virtual women you create.
too late for me....
https://redd.it/1pqqfqv
@rStableDiffusion
Reddit
From the StableDiffusion community on Reddit
Explore this post and more from the StableDiffusion community
TurboDiffusion: Accelerating Wan by 100-200 times . Models available on huggingface
https://redd.it/1pqxxoh
@rStableDiffusion
https://redd.it/1pqxxoh
@rStableDiffusion
Reddit
From the StableDiffusion community on Reddit: TurboDiffusion: Accelerating Wan by 100-200 times . Models available on huggingface
Explore this post and more from the StableDiffusion community